One last thing: you may see affiliate links on this website in different places before you continue reading. We have no effect on views at all, but we merely help to ensure the material is released constantly for free! The first thing you need to do is create an account (if you haven’t already done so). You will be required for some regular details and a credit card because AWS is pay-as-you-go. At aws.amazon.com, you may sign up.
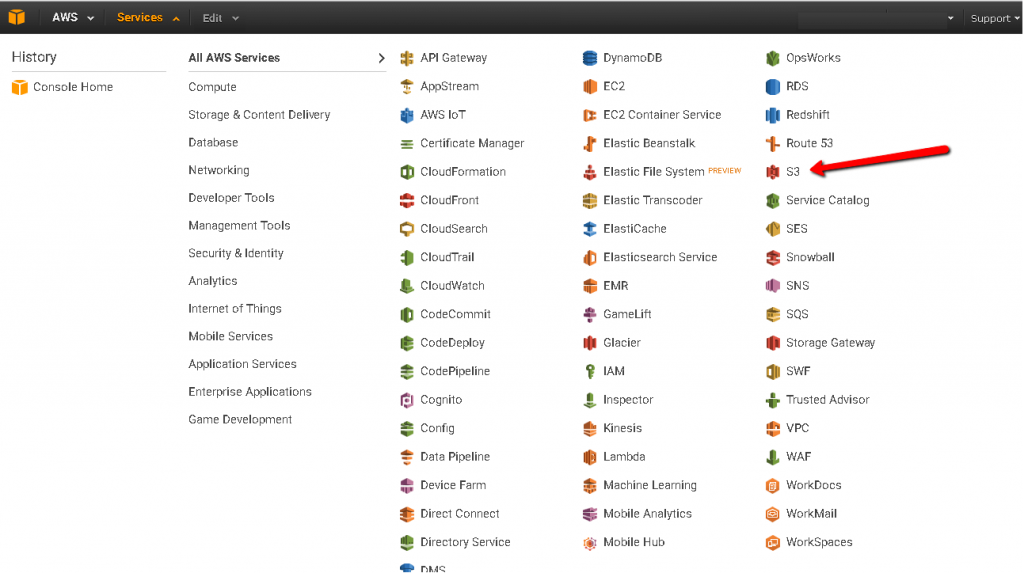
Step 2: Navigate to S3 from the services menu
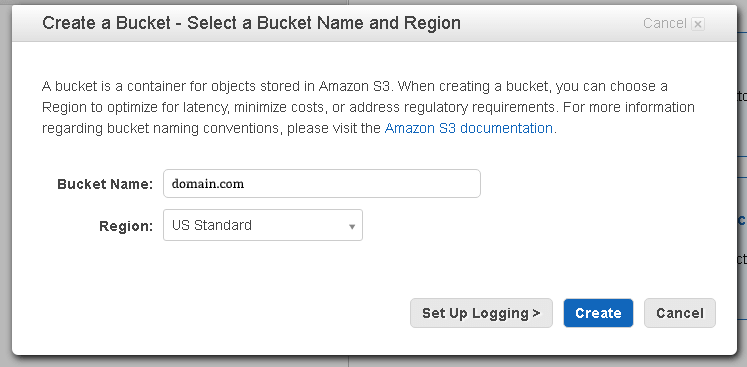
Step 3: Create a new bucket
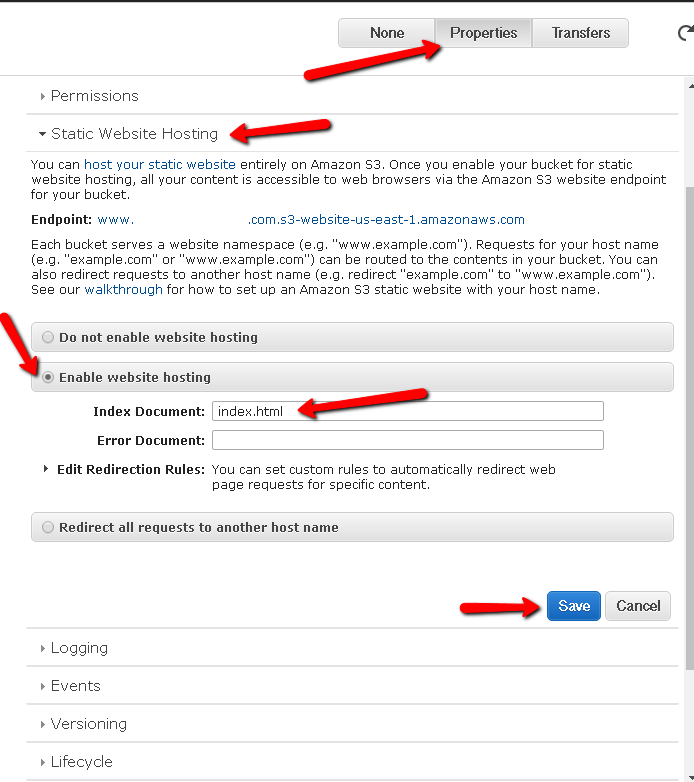
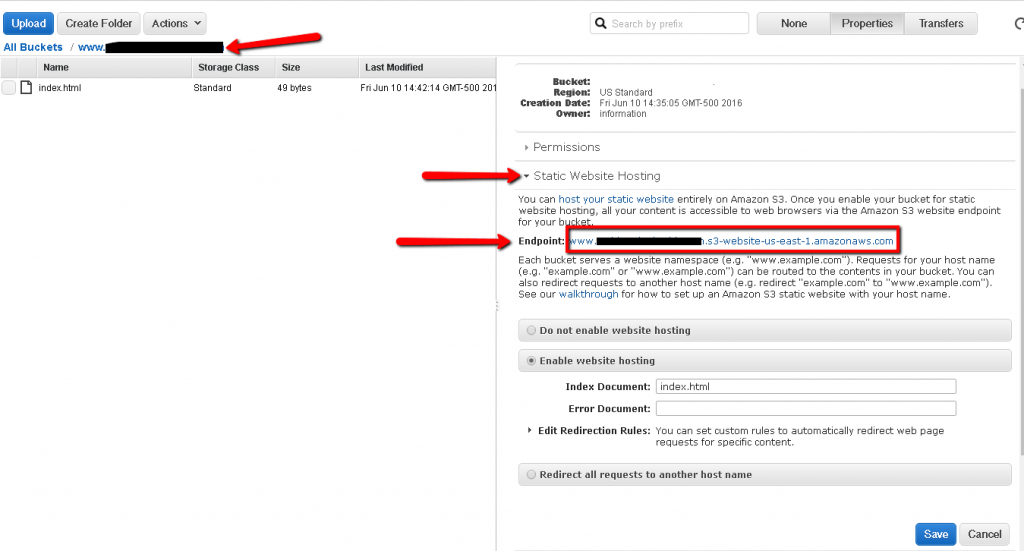
Step 4: Enable Static Website Hosting
Click on the name of the container and then on the tab “Properties” on the right side of the screen, then on the dropdown of “Static Website Hosting.” Choose the “Allow Static Website Hosting” method. In the “Index File” tab, select “index.html” (unless your index file is anything else), and save the changes.
Step 5: Uploading
Click the “Import” icon, drag and drop files into the bucket of your website. Then click “Download off.”
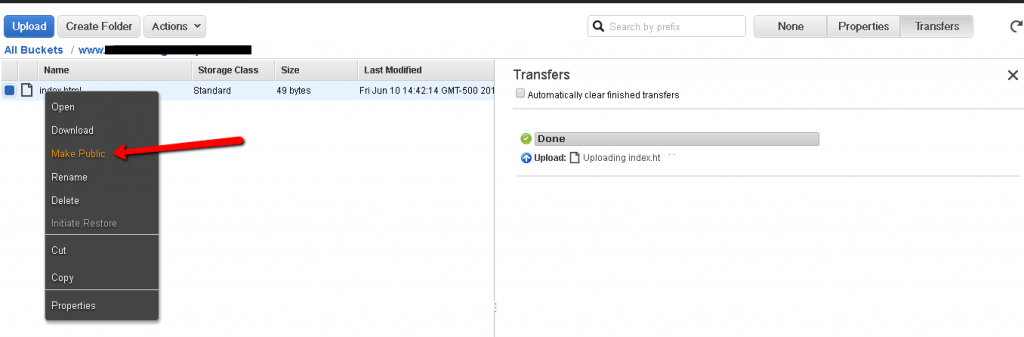
Step 6: Making Public
Right click on the file name or names and then press “Make Public.” You’ll need to do this if you add some data to S3 as they’re going to be secret by default and they need to be public in order to view them through a web browser. If you need to re-upload some files / folders, this can be annoying, but this is just how S3 is set up, at least for now.
Step 7: Creating CNAME
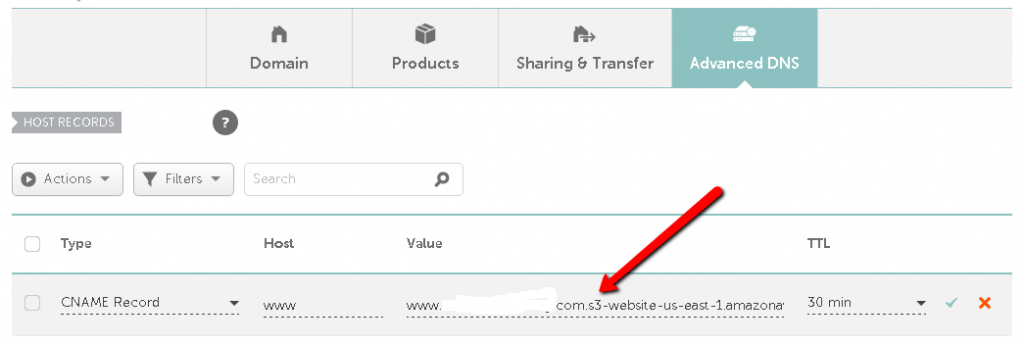
Build a CNAME at the registrar of your domain name leading to the origin of the S3 bin. When you click back on the bucket term, you will see the URL for the bucket endpoint again on the “Properties” page and again on “Static Website Hosting.” There are various ways to create CNAME records for each domain name registrar such as Namecheap, GoDaddy, etc. If at the registrar you need to learn how to do this, be sure to look at their assistance materials or call their service.
The picture below displays Namecheap’s Advanced DNS tab — your registrar can vary depending on who you use to register domain names.
Step 8: Test your website
When up to this point you have completed everything and the DNS has propagated (which can take 24-48 hours), the website can load properly!
Additional Tips: Because S3 is a pay-as-you-go program, setting up a billing warning is a good idea to inform you if your account costs reach a certain point. If you don’t, you might get lots of tourists or someone might start spamming your web with 1000s of bots and blowing up your bill. There is currently no way to “switch off” AWS services at a defined level, but make sure that if you set up an alert you get it to an email address that you regularly track so that you can hop in and disable the services manually if you need it. Note that S3 just enables the storing of static information, so no scripting on the server side. It means you can’t host PHP scripts, or anything else that requires action or execution on the server side.